Thursday, August 26, 2010


How to add a new device to Cacti.

Under the Management Tab select Devices.


This will load the devices page from where you can change existing devices or add a new device.


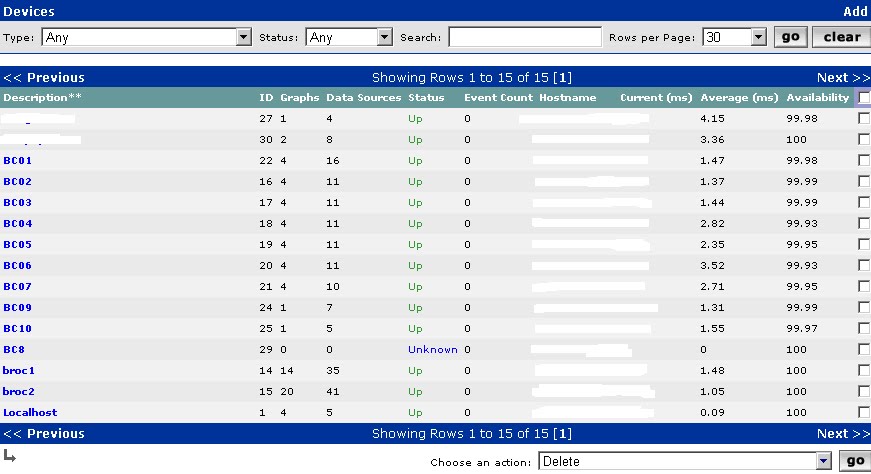
In the top right corner click the add button to add a new device. This will load the Devices page from where all the new information can be entered.


In the Description Tab you enter the name of what you want the device to show up as eg. BC10. Under Host name you can either add the fully qualified host name or the IP address of the host. Under Host Template you can either select a template that you have made ( I find the template normally doesn’t work) or you can leave it as non and add the data sources later. Leave Downed Device Detection as SNMP and the other values for Ping Timeout Value and Ping Retry Count as default.

SNMP Version can be changed to version 2, you could slect Version 3 if you like or if the device requires it, mostly I don’t because version 2 will suffice with less to fill in. Community string needs to be filled in with the community string you put onto the device you wish to monitor. SNMP port can be left as deauflt unless you set the port number on the device to be something different or the device deafualts to a different port. SNMP Timeout and Max OID’s can be left as default. Notes can be anything you want to write about the device for future reffernce.

Once you have filled out everything, click the create button at the bottom right of the page to create the device.

If you created it properly you should get something at the top of the page that is similar to this.


BC10 (***.***.***.***)
SNMP Information
System:*******
Uptime: *****
Hostname: *****-******-bc10
Location: ******
Contact:*******


Otherwise you may likely get if either the device is unresponvie or incorrectly set up. If you get this you will need to change the setting till you get no SNMP errors.


Ot
BC8 (***.***.***.***)
SNMP Information
SNMP error


FortiNet 3G Redundacy

Changing the default distance on the 3G connection

FGT# conf sys modem
FGT# set distance <1-255>
FGT# end

 Routing
You need one default route for each interface. Indicate which route is preferable by specifying the distance - the lower distance route is declared active and placed in the routing table.

Determining whether link is down (ping servers)Define the ping server - this is a device that will respond to ping thereby indicating whether that link is up. It is usually recommended that you use the next hop / gateway device as your ping server.

Define the ping server under System>Network>Edit Interface.

Firewall policies
You must define duplicate firewall policies to ensure that after traffic fails over, it is permitted through the firewall. For example, Internal>WAN1 & Internal>WAN2.

Setting up the modem for NZ (Vodafone)

config system modem
set status enable
set mode redundant
set connect-timeout 30
set interface "wan1"
set phone1 "*99***1#" #This is specific to Vodafone
set extra-init1 "AT&FE0V1X1&D2&C1S0=0" #This appears to be specific to Vodafone E220
set distance 100
end
config system interface
edit "wan1"
set detectserver "74.125.155.104" #Find some reliable upstream server to ping test
next
end


3G Telecom Settings

set phone1 "#777"
set username1 "mobile@jamamobile"
set passwd1 "telecom"
#No “extra-init1” is necessary


Notes to Self: 

Dont forget the ping server!

Currently 3G redundancy only works for one interface , eg one internet connection, so in the case of VPN redundancy and multiple connection to the internet, place the redundancy on the last resort connection. 


Lazy Mans Monitoring CactiEZ

For all those who dont want to create their own Cacti/Nagios image here is a great place to go.

Cut n Paste from their site.


Cacti Made Easy

CactiEZ is a self installing Linux Distribution based off CentOS that sets up and configures a customized Cacti install. Everything is designed to be completely automated and working directly out of the box. This compact distro is loaded with extra features such as Syslog and Netflow data collection, Weathermaps, Reports, Auto Discovery, Router Config backup, Nagios, and much more! Both 32 Bit and 64 Bit installations are possible from the same CD.

This gives your system administrators more time to work on the real issues, and less time configuring and setting up your Monitoring System. Best of all, its absolutely FREE!

Fierce DomainScanner

About Fierce the DomainScanner

Fierce is currently used as a brute force Domain Scanner. This means that you feed it the domain eg, rapidshare.com, along with some of the variations that the domain uses for sub domains rs100,rs101 and so on. It will the then try to find anything matching the Domain within the subnets it find scanning up and down the range for more addresses matching the supplied Domain. Currently I use the following sites to generate the wordlists that will be used for the brute force. http://mytexttools.com/Generate-List-of-Numbers.html to generate the strings that I gather from http://www.robtex.com/dns.

How to use Fierce.

Hosts.txt

This is the default brute force list that fierce will use if another isnt supplied through the –wordlist command.

Fierce.pl

This is the main script. The for help type perl fierce.pl –help. Default example is perl fierce.pl –dns rapidshare.com –file rapidshare.com. This will scan the rapidshare domain using the default hosts.txt file and output the information to the fire rapidshare.com.

Other useful commands

-wide   This will scan the whole range as opposed to the default which is 5 either side of a conformed hit.

-wordlist  textfile.txt      This is to supply a custom brute force list.

Example; perl fierce.pl –dns rapidshare.com –wide –wordlist rapidshare.txt –file rapidshare.com

This will scan rapdishare.com using all the variations supplied in the rapidshare.txt file. Any hits it does get it will scan up and down the whole subnet range for more hits and then output the information to a file called rapidshare.com.


Limitations

The limitation I have found are if you supply far to many variations to the brute force lists, it can cause the script to either fall over and not complete or to take days to complete. Normally around 30-40 Thousand will run fine, though these can still fall over, over 100 Thousand and its highly unlikely that the script will complete.

Its best to create a wordlist for each domain to keep the number of brute force entries to a minimum.

Usage
perl fierce.pl -dns rapidshare.com -wide -threads 50 -wordlist filename -file outputfile


Thanks to the Great People at http://ha.ckers.org/fierce/ for the code and know how.

Tuesday, August 24, 2010

The procedure to disable/enable a slot card on APX/TNT

. Use “show” command to address which slot you want to disable/enable(in this case, we use slot 1 as example) slot 1;

> show

Shelf 1 ( standalone ):

Reqd Oper Slot Type

{ shelf-1 slot-1 0 } UP UP 8e1-card

{ shelf-1 slot-2 0 } UP UP 8e1-card

{ shelf-1 slot-3 0 } UP UP 8e1-card

{ shelf-1 slot-4 0 } UP UP ether3nd-card

{ shelf-1 slot-5 0 } UP UP madd2-card

……..

2. Get into the corresponding slot-admin profile

> dir slot-admin

15 09/09/2009 08:44:48 { shelf-1 slot-1 0 }

15 09/09/2009 08:44:48 { shelf-1 slot-2 0 }

15 09/09/2009 08:44:48 { shelf-1 slot-3 0 }

15 09/09/2009 08:44:48 { shelf-1 slot-4 0 }

……..

> read slot-admin {1 1 0}

SLOT-ADMIN/{ shelf-1 slot-1 0 } read

> list

[in SLOT-ADMIN/{ shelf-1 slot-1 0 }]

slot-address* = { shelf-1 slot-1 0 }

reqd-state = reqd-state-up

3. Change the state as you want:

> set reqd-stat ?

reqd-state:

The required operational state of the slot. Changing this value initiates a state change. The change is complete when the current state changes to match the reqd-state. this value is initialized from the administrative state of the slot at system startup.

Enumerated field, values:

reqd-state-down: The addressed device is required to be in the down, non-operational state.

reqd-state-up: The addressed device is required to be in a normal operating state.

reqd-state-maint: The addressed device is required to be in a non-operational maintenance state.

> set reqd-stat =reqd-state-down

> write

4. Use “show” to double-confirm whether the change is activated:

> show

Shelf 1 ( standalone ):

Reqd Oper Slot Type

{ shelf-1 slot-1 0 } DOWN RESET 8e1-card

{ shelf-1 slot-2 0 } UP UP 8e1-card

{ shelf-1 slot-3 0 } UP UP 8e1-card

{ shelf-1 slot-4 0 } UP UP ether3nd-card

{ shelf-1 slot-5 0 } UP UP madd2-card

TX and RX errors or RAS ethernet port

labapx>show

Controller { right-controller } ( PRIMARY ):

Reqd Oper Slot Type

{ left-controller } UP UP ( SECONDARY )

{ shelf-1 slot-11 0 } UP UP 8e1-card

{ shelf-1 slot-12 0 } UP UP 8e1-card

{ shelf-1 slot-13 0 } UP UP 8e1-card

{ shelf-1 slot-14 0 } DOWN RESET madd2-card

{ shelf-1 slot-15 0 } UP UP madd2-card

{ shelf-1 slot-16 0 } UP UP madd2-card

{ shelf-1 slot-17 0 } UP UP madd2-card

{ shelf-1 slot-18 0 } UP UP madd2-card

{ shelf-1 slot-20 0 } UP UP ether3nd-card

{ shelf-1 slot-40 0 } UP UP ether3nd-card

cwam-t-006>open 20

Step 2, Find out the logic interface number for the physical ports

ether3nd-1/20> ifmgr -d

if slot:if u p ifname mac addr local-addr

----------------------------------------------------------------

000 0:00:000 * pb0 00:00:00:00:00:00 0.0.0.0/32

002 1:42:587 * ie1-20-2 00:d0:52:04:70:b1 203.22.111.20/25

003 1:42:588 * ie1-20-3 00:d0:52:04:70:b2 0.0.0.0/0

004 1:42:589 * ie1-20-4 00:d0:52:04:70:b3 192.168.201.8/24

009 1:20:009 * lo0 00:00:00:00:00:00 127.0.0.1/32

010 1:20:000 * rj0 00:00:00:00:00:00 127.0.0.2/32

011 1:20:000 * bh0 00:00:00:00:00:00 127.0.0.3/32

012 0:00:000 * local 00:00:00:00:00:00 127.0.0.1/32

Step 3, Check the stastics

ether3nd-1/20> ifstat 2

Octets Unicast Multicast Broadcast Discards Errors UnkProto

IF 2 : ie1-20-2

In: 5040460 82642 0 0 655 0 8

Out: 0 0 0 0 0 0

Useful Lucent APX/TNT Commands

show (shows all the cards and status)
fatal (shows error log and event messages)
redundant (swaps controller cards over)
red-bits (shows current hardware revision for controller card)
modem -help (command info)
mdmdis (disables a set number of modems on a slot (eg mdmdis 1 15 1 96) this would disable 1-96 modems on slot 15 shelf 1)
mdmen (same as mdmdis but for enabling modems)

read slot-info { 1 15 0}
list serial (these two commands allow you to read the serial number of a card that has been installed into a box without having to remove it)

uptime -a (show the uptime of the slot cards)
slot –b (bounce a slot card eg slot -b 8)
save console (shows the config)
log –p (shows the log, though limited in space so doesnt hold alot)

APX>get slot-info {1 15 0}
[in SLOT-INFO/{ shelf-1 slot-15 0 }]
slot-address* = { shelf-1 slot-15 0 }
serial-number = 1035301756
software-version = 10.1
software-revision = 0
software-level = ""
hardware-level = " A"
software-release = e153


Save console (prints out the setting for the box, can be used as save console snmp to print specific settings)

The Beginning

Why a blog?

Mainly this blog is going to be my dumping grounds for information that I pick up along the way that I feel could be a help to myself and need to store or publish for me to find easier. Hopefully some of the networking stuff I post on here will help others to.

Also if any of my blog posts are copies of your own IP throw it in the comments with your own http address of the content and I will change/remove my blog post.